Why Bathroom Tiling is Different from Any Other Room
Every room in a home is tiled differently depending on its conditions. A bathroom is unique for three reasons that affect every decision from substrate to grout. Constant moisture exposure means shower walls, floor waste surrounds, bath edges, and vanity areas all receive regular direct water contact, and any gap in the waterproofing or tiling system allows moisture ingress that causes structural damage, rotting framing, mould growth, and concrete cancer in Melbourne's older homes.
Victorian Building Authority requirements are the second reason: wet area waterproofing in Victoria is mandatory under the Building Act, to the standard AS 3740 (Waterproofing of Domestic Wet Areas), and in most cases must be inspected before tiling covers it. A tiler who skips or shortcuts waterproofing is creating a non-compliant installation.
The third reason is long replacement cycles. Bathroom tiles are not replaced every few years; a properly installed bathroom should last 15-25 years before renovation is warranted again. Every decision made during the renovation, tile format, grout joint size, waterproofing product, substrate type, compounds over that timeframe, so getting it right the first time is far less expensive than rectifying a failed installation.
What is involved in tiling a bathroom in Melbourne?
Tiling a bathroom in Melbourne involves six main stages: demolition and strip-out of the existing bathroom; substrate installation; waterproofing to AS 3740 standard; setting out and tile layout planning; tile installation with appropriate adhesive and grout; and finishing (silicone joints, threshold strips, and cleaning). Each stage must be completed correctly before the next begins. Ali Star Tiling manages all tiling and waterproofing stages across Melbourne's western and northern suburbs.
Stage 1: Demolition and Strip-Out
Before any new work can begin, the existing bathroom must be fully stripped back to the structural framing, removing all existing tiles, the substrate behind them, old waterproofing, and any damaged or moisture-affected framing.
In Melbourne's older homes, particularly weatherboard properties in the western suburbs built before 1990, the strip-out stage commonly reveals problems that were not visible from the surface: rotting stud framing from years of moisture ingress through failed grout, fibrous cement sheet that has absorbed water and softened, or inadequate original waterproofing. Addressing them properly at strip-out is far less expensive than tiling over them and dealing with the consequences later. A tiler who skips the strip-out and tiles over existing tiles or substrate is taking a shortcut that transfers risk to the homeowner.
Demolition typically involves tile removal (in older bathrooms, tiles may be set in a thick mortar bed rather than adhesive, adding demolition time and weight), substrate removal down to the framing, inspection of stud and bottom plate condition for moisture damage, and waste removal, with skip bin access factored into the quote for Melbourne's western growth corridor.
Stage 2: Substrate Installation
The substrate is the surface the waterproofing and tiles are applied to. In wet areas it must be rigid, dimensionally stable, and appropriate for wet-area use. Compressed fibre cement sheet (such as Scyon Axon or Villaboard) is the most common wet-area substrate for standard Melbourne bathroom walls and floors; it must be installed with correct screw spacing and sheet joins filled and taped before waterproofing. Lightweight concrete or render board (such as Hebel or Wedi) is a pre-waterproofed, highly moisture-resistant rigid board used for higher-spec renovations, niches, and complex geometries, more expensive than fibre cement but lighter than traditional render.
Standard plasterboard, even “moisture-resistant” (MR) plasterboard, is not an acceptable substrate for wet area tile installation in Melbourne, despite the labelling; MR board degrades under the sustained water exposure of a shower environment. If a tiler proposes tiling over MR plasterboard in a shower, this is a red flag.
What is the correct substrate for tiling a bathroom in Melbourne?
In Melbourne wet areas, compressed fibre cement sheet is the standard substrate for tiling. It must be fixed to structurally sound framing with corrosion-resistant screws at the correct spacing, with joins filled and taped before waterproofing. Standard plasterboard, including MR grade, is not appropriate for shower walls or any direct wet area. Ali Star Tiling installs and prepares correct wet-area substrates as part of every bathroom tiling Melbourne project.
Stage 3: Waterproofing, The Most Critical Stage
Waterproofing determines whether a Melbourne bathroom performs correctly over its full life. It is also the stage most likely to be a shortcut in lower-cost renovations, because once the tiles go on, no one can see whether it was done correctly.
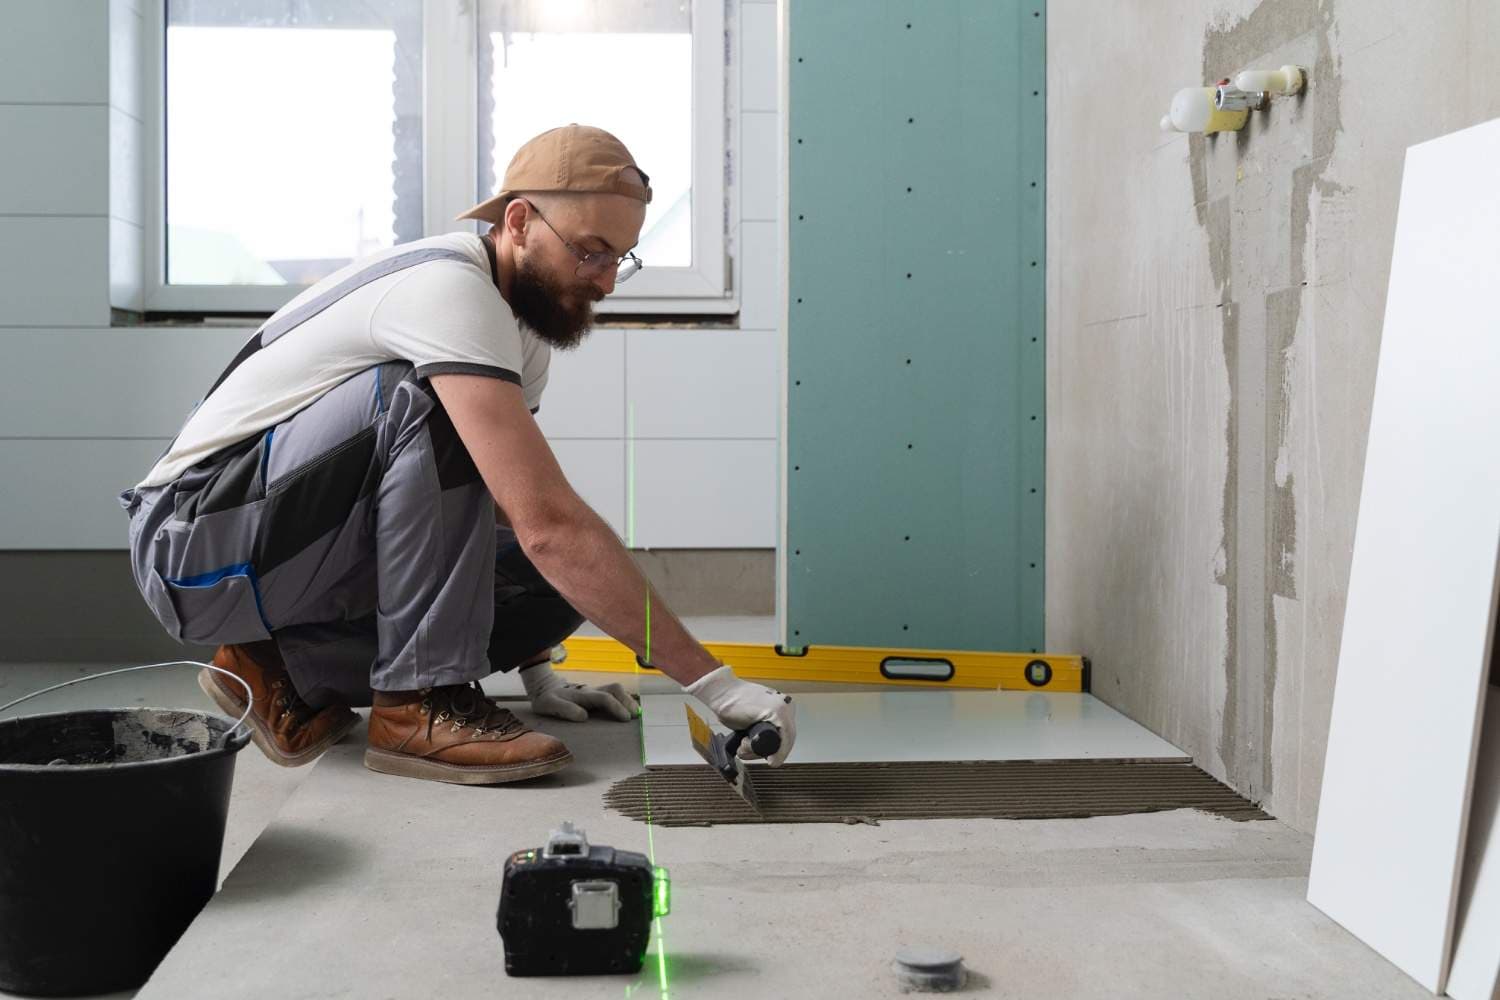
In Victoria, wet area waterproofing must comply with AS 3740:2021. For a shower enclosure this means: walls waterproofed to a minimum height of 1,500mm from the shower floor; the full shower floor and a minimum 150mm up the adjacent walls waterproofed, or the entire bathroom floor if there is no step between the shower and the rest of the room; all internal corners, hob junctions, and penetrations reinforced with fabric tape embedded in the membrane; a full cure typically 24-48 hours minimum, longer in Melbourne's cooler months before tiling commences; and, in a permitted renovation, inspection by a building inspector before tiling covers the membrane. Ali Star Tiling coordinates this inspection process as part of every project, and installs AS 3740-compliant waterproofing services in Melbourne. For a deeper look at this stage, read our guide to waterproofing before tiling in Melbourne.
Is waterproofing required before tiling a bathroom in Melbourne?
Yes. Waterproofing wet areas before tiling is a mandatory requirement under the Building Act in Victoria, to standard AS 3740:2021. Shower walls must be waterproofed to a minimum height of 1,500mm, shower floors must be fully waterproofed, and all internal corners must be reinforced with fabric tape. The waterproofing must cure before tiling begins and must be inspected before being covered in a permitted renovation.
Stage 4: Tile Selection, Making the Right Choices
Wall tiles need to be smooth, non-porous, and appropriately sized. Large-format rectified tiles (600x1200mm or 600x600mm) are the most popular choice for contemporary Melbourne bathrooms, creating fewer grout lines and a cleaner feel, though they require a very flat substrate and an experienced tiler. Subway tiles (100x200mm or 75x300mm) remain widely used, particularly in period homes, and are forgiving on slightly imperfect substrates. Textured and fluted wall tiles are growing in popularity, adding depth, though they show soap residue more readily than smooth finishes.
Floor tiles have specific requirements wall tiles do not: they must meet the slip resistance requirements of AS 4586 for wet area floors. Polished tiles, whether porcelain, marble, or other stone, are not appropriate for bathroom floors; they become dangerously slippery when wet regardless of how they look in a showroom.
| Zone | Min. Slip Rating (AS 4586) | Common Tile Choices |
|---|
| Shower floor (enclosed) | P4 minimum | Small-format mosaic, textured porcelain, stone with sawn finish |
| Bathroom floor (outside shower) | P3 minimum | Large-format porcelain (satin finish), honed stone, textured ceramic |
| Ensuite, same level as shower | P4 (if no segregation) | Textured porcelain, non-polished stone |
Grout colour: the decision most people underestimate
Matching grout creates a seamless, expansive look that works well with large-format tiles and shows less dirt over time. Contrasting grout creates a grid-like effect that emphasises the layout, classic with white subway tiles, but shows soap scum and calcium buildup more readily, requiring more frequent cleaning in a hard-water area like Melbourne's western suburbs. White grout on a shower floor is almost always a regret it discolours within months under constant water, soap, and foot traffic, so a mid-grey or charcoal grout on shower floors is far more practical.
Stage 5: Setting Out and Layout
Setting out is the planning stage that determines where every tile will fall before any adhesive is applied. A tiler who does not set out properly, who just starts tiling from one corner, almost always ends up with awkward cut tiles in visible positions that cannot be undone without removing work already done.
Professional setting out involves establishing the centre lines of each wall so cut tiles at each edge are equal in size, planning for the position of niches, feature strips, mixer heights, and shower head locations before setting out begins, checking the floor level across the entire bathroom since Melbourne's older homes are rarely perfectly level, and dry laying complex layouts such as herringbone or feature walls before adhesive is mixed to catch any issues while they're still reversible.
Stage 6: Tile Installation, Adhesive and Application
Flexible polymer-modified adhesive (C2TE or C2TES) is the standard for all Melbourne bathroom wall and floor applications; its flexibility accommodates minor movement and it must be used in wet areas. Rapid-set adhesive suits faster turnaround jobs but requires experience since working time is shorter, while epoxy adhesive offers a stronger bond for glass mosaic, heavy stone, or specific substrates at a higher cost.
Australian standard AS 3958.1 requires a minimum 95% adhesive coverage under tiles in wet areas, higher than the 80% minimum for dry areas. Achieving this consistently in a shower requires back-buttering, applying adhesive to the back of the tile as well as the substrate, for tiles larger than 300x300mm. Spot-fixing, applying adhesive in blobs or at the corners only, does not meet this standard and is a common shortcut in lower-cost installations; tiles fixed with inadequate coverage are more likely to crack, hollow, and eventually detach, particularly on floors.
Grout is applied after the adhesive has cured, typically 24 hours in standard Melbourne conditions, longer in cooler winter months, with joint size consistent with the tile manufacturer's recommendations. Internal corners where two tiled surfaces meet must be finished with a flexible silicone sealant in a matching colour, not rigid grout, which cracks as the building moves with seasonal temperature changes, one of the most common causes of water ingress in otherwise correctly installed Melbourne bathrooms.
How long does it take to tile a bathroom in Melbourne?
Tiling a full bathroom renovation in Melbourne typically takes 3-5 working days for the tiling stage alone, depending on bathroom size, tile format, and features like niches or feature walls. The complete renovation, including demolition, substrate, waterproofing, tiling, and finishing, typically takes 5-10 working days, with waterproofing adding at least one curing day before tiling can begin. Ali Star Tiling provides a project timeline with every bathroom quote.
Stage 7: Finishing, Silicone, Thresholds, and Final Clean
The finishing stage is what separates a tiled bathroom from a completed bathroom. All internal corners are caulked with matching colour silicone, including the joint between floor and wall tiles, the shower hob, and all penetrations, sealing the junctions most likely to move. The transition between the tiled floor and the adjacent floor is finished with an aluminium or stainless threshold strip covering the cut tile edge. A penetrating grout sealer, applied once the grout has fully cured (typically 7 days), reduces moisture and staining absorption, particularly important for lighter grout colours in Melbourne's hard water areas, and a final clean removes any adhesive or grout haze with the appropriate cleaner for the tile type.
Bathroom Tiling Costs for a Melbourne Renovation
A full bathroom renovation tiling scope, including demolition, substrate, waterproofing, tiling, grouting, and finishing, involves a range of cost components. Here is a realistic breakdown for Melbourne in 2026:
| Cost Component | Typical Range |
|---|
| Demolition and strip-out | $400 – $900 |
| Substrate installation | $300 – $700 |
| Waterproofing (AS 3740) | $400 – $900 |
| Wall tiling labour (excl. tiles) | $45 – $75/m² |
| Floor tiling labour (excl. tiles) | $50 – $85/m² |
| Tile supply | $25 – $150+/m² |
| Grouting and silicone | $150 – $400 |
| Finishing (thresholds, clean) | $100 – $300 |
| Total typical Melbourne bathroom | $3,500 – $8,500+ |
These are indicative ranges for Melbourne metro in 2026. Final pricing depends on bathroom size, tile selection, substrate condition, and project complexity see our full bathroom tiling cost guide for a detailed breakdown. Ali Star Tiling provides itemised, written quotes call 0455 233 816 or email alistartiling@yahoo.com.
How much does a full bathroom renovation tiling cost in Melbourne?
A full bathroom renovation tiling scope in Melbourne, including demolition, substrate, AS 3740 waterproofing, wall and floor tiling, grouting, and finishing, typically costs between $3,500 and $8,500 depending on bathroom size, tile choice, and complexity. Labour for wall tiling starts from $45-$75/m² and floor tiling from $50-$85/m², excluding tile supply. Waterproofing adds $400-$900.
Common Bathroom Tiling Mistakes Melbourne Homeowners Should Avoid
- Choosing the builder before the tile: locking in a tiler before selecting tiles often means the quote changes once the actual tile size and format is confirmed.
- Buying insufficient tile quantity: standard wastage allowance is 10% for straight lay and 15%+ for diagonal or herringbone, and tiles from different batches can show colour variation.
- Assuming the cheapest quote is the best value: a lower quote almost always reflects reduced scope, less substrate preparation, shortcut waterproofing, or lower-grade adhesive.
- Not confirming waterproofing is included: always ask whether the quote includes waterproofing to AS 3740 and whether it will be inspected before tiling.
- Using rigid grout at internal corners: these junctions must be silicone-jointed, not grouted, or they crack within the first year due to normal building movement.
Planning a bathroom renovation in Melbourne? Call Ali Star Tiling on 0455 233 816 or email alistartiling@yahoo.com for a free, no-obligation quote. We service Melton, Kurunjang, Caroline Springs, Sunbury, Werribee, and surrounding Melbourne suburbs. Written quotes provided before any work starts.
FAQs
Frequently Asked Questions
Bathroom Renovation Tiling Melbourne: common questions Melbourne homeowners ask before starting a bathroom renovation.
01Do I need a permit to renovate a bathroom in Melbourne?+
Whether a permit is required depends on the scope of work. In Victoria, any work that involves waterproofing a wet area, moving plumbing, or structural changes typically requires a building permit. Even for tiling-only renovations in an existing bathroom, the waterproofing stage is regulated under the Building Act and AS 3740. Ali Star Tiling advises clients on permit requirements before work begins and can work with your building surveyor if required.
02Can tiles be laid over existing bathroom tiles in Melbourne?+
In some cases, yes if the existing tiles are firmly bonded, the substrate is sound, and the added thickness can be accommodated at door thresholds and fittings. However, tiling over existing tiles does not address underlying waterproofing and cannot be done if the existing waterproofing is at end of life. A site assessment is required to determine whether over-tiling is appropriate for your specific bathroom.
03What tile size is best for a small Melbourne bathroom?+
Large-format tiles (600x600mm or larger) actually work well in small bathrooms fewer grout lines make the space feel more expansive. The key is correct installation: large tiles on wall and floor require very flat, prepared surfaces. For floors in a small bathroom, 600x600mm porcelain in a satin finish with a fine grout joint is a popular and practical choice that Melbourne tilers install regularly.
04How do I find a reliable bathroom tiler in Melbourne?+
Look for a tiler who provides a written, itemised quote that separately lists waterproofing, substrate preparation, tiling labour, and tile supply. Ask whether waterproofing will comply with AS 3740 and whether it will be inspected before tiling covers it. Ask for references or portfolio images of completed bathroom renovations. Ali Star Tiling provides written quotes, installs AS 3740-compliant waterproofing, and services Melbourne's western and northern suburbs from its base in Kurunjang.