Floor tiling is one of the most visible and long-lasting decisions you make in a Melbourne home renovation. A tiled floor in a living area, hallway, or kitchen sets the visual tone for the entire space, affects how large or small a room feels, and when installed correctly will still be performing perfectly fifteen to twenty years from now. When installed incorrectly, the problems surface within months: hollow tiles, cracked grout, lippage between tiles, and substrate movement that causes failures no amount of repair work can permanently fix.
This guide covers the full picture for Melbourne homeowners planning floor tiling in 2026: which tile types work best in which rooms, how to understand costs before you get a quote, what the installation process actually involves, and what to look for when choosing a Melbourne floor tiler. Whether you are tiling a living room in Melton, a hallway in Caroline Springs, a laundry in Sunbury, or a commercial floor in the western suburbs, the principles are the same and getting them right from the start is always cheaper than fixing them later. The same standards apply across our wall and floor tiling work more broadly.
Floor Tiling vs Wall Tiling: Why They Are Different Jobs
Many Melbourne homeowners assume floor tiling and wall tiling are essentially the same skill applied to different surfaces. They are not. Floor tiling carries a distinct set of requirements that make it more technically demanding than most wall tiling:
1. Load-bearing requirements
Floor tiles must withstand foot traffic, furniture weight, and the repeated compression and release that comes with a floor being walked on thousands of times a year. Tile specifications include a PEI (Porcelain Enamel Institute) wear rating that indicates how much foot traffic a tile can handle without surface degradation. Wall tiles have no equivalent requirement; a tile rated PEI 1 or 2 is suitable for walls but will visibly wear on a floor.
2. Subfloor flatness and deflection
Floor tiles are far more sensitive to subfloor irregularities than wall tiles. Australian Standard AS 3958.1 requires the subfloor to be flat within 3mm over a 1800mm straightedge for standard floor tiles, and within 3mm over 3000mm for large-format tiles (600mm+). Any variation beyond this causes lippage — an uneven step between adjacent tiles that is impossible to fix without removing and relaying the affected area.
3. Adhesive coverage standards
Wet areas aside, floor tiles in dry living areas require 80% adhesive coverage under AS 3958.1. Wet-area floors (laundry, bathroom) require 95% minimum coverage. These are not suggestions: inadequate coverage results in hollow tiles that crack under point loads and eventually debond from the substrate.
4. Grout joint performance
Floor grout joints endure far more mechanical stress than wall grout. Floor grout must be harder and more abrasion-resistant. For living areas and hallways, unsanded grout is not appropriate in joints wider than 3mm. Epoxy grout is increasingly specified for laundry and kitchen floors where chemical and stain resistance is needed.
Best Floor Tile Types for Melbourne Homes: Room by Room
The right tile for a Melbourne floor depends on the room, the traffic it receives, the aesthetic the homeowner wants, and the subfloor condition. Here is how the main options compare across the most common rooms.
Living Areas and Open-Plan Spaces
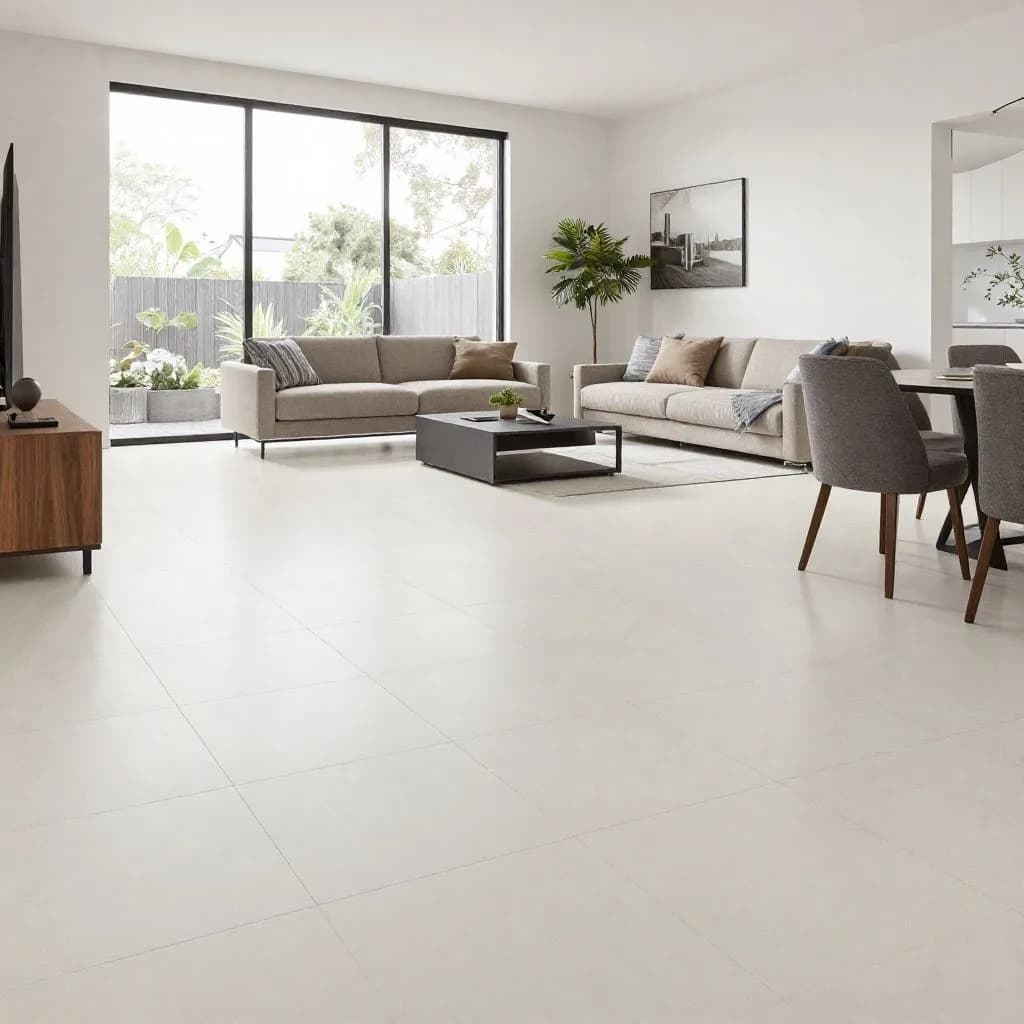
Living areas are the largest single tiled floor space in most Melbourne homes and the most visually prominent. The dominant trend in Melbourne living areas in 2026 is large-format porcelain — 600x600mm, 600x1200mm, and even 800x800mm formats — that minimise grout lines and create an expansive, seamless look across open-plan spaces.
| Tile Type | Size Range | PEI Rating | Best Finish | Notes |
|---|---|---|---|---|
| Porcelain (rectified) | 600x600mm to 800x800mm | PEI 4 | Satin or structured | Most popular for Melbourne living areas. Durable, low-maintenance. Requires flat subfloor. |
| Ceramic (glazed) | 300x300mm to 600x600mm | PEI 3–4 | Satin or matt | More affordable than porcelain. Slightly more porous. Wide colour and pattern range. |
| Natural stone (travertine, marble, limestone) | 300x300mm to 600x600mm | Varies | Honed or polished | Premium result. Requires sealing and maintenance. Honed finish is safer for floors. |
| Timber-look porcelain | 200x1000mm to 300x1200mm | PEI 4 | Structured wood texture | Growing in popularity. Timber look without moisture sensitivity. |
Hallways and Entries
Hallways are the highest foot-traffic areas in most Melbourne homes — concentrated traffic in a narrow space means wear rating matters more here than anywhere else indoors. A PEI 4 minimum is recommended for Melbourne hallways. Format choice also affects the visual length of a hallway: tiles laid diagonally or in a running bond pattern make a narrow hallway feel wider, while large-format tiles laid straight with a 3mm joint and matching grout create the longest, most uninterrupted sightline.
Kitchens
Kitchen floors face a combination of high foot traffic, food and liquid spills, and the weight of appliances. Porcelain is the preferred choice; its low porosity means spills do not penetrate the tile surface, and it wears well under daily kitchen use. For kitchen floors, a satin or lightly textured finish is preferred over polished porcelain that becomes slippery when wet and shows every scratch from chairs being moved. This same durability logic underpins our kitchen tiling projects across Melbourne. For splashback and feature wall pairings to go with it, see our kitchen tiling ideas Melbourne guide.
The tile format for a kitchen floor also needs to consider the transition to adjacent living areas. Open-plan homes increasingly use the same tile throughout kitchen, dining, and living spaces, a decision that creates visual continuity and eliminates the step change and threshold strip that occurs when two different floor materials meet.
For a full breakdown of kitchen floor tile selection alongside splashback coordination, see our kitchen tiling Melbourne guide or our kitchen tiling prices Melbourne breakdown for current splashback and floor rates.
For pricing by tile type across the whole home, see our floor tiling prices Melbourne breakdown.
Laundries
Laundry floors are a wet area under AS 3958.1 and require the same waterproofing considerations as a bathroom floor — including a fall to the floor waste and a minimum P3 slip rating (P4 recommended). Many Melbourne laundries use smaller-format tiles (300x300mm) with a textured or matte finish rather than large-format porcelain, because the smaller grout joints provide additional grip and the textured surface is safer when wet.
Laundry floors also frequently need to accommodate a step-down threshold where the laundry meets the hallway or living area. This transition needs to be planned during tile selection to ensure the threshold height works with both floor levels.
For the full waterproofing requirements, drainage falls, and tile costs specific to this room, see our laundry tiling Melbourne guide.
Commercial Floors in Melbourne
Commercial floor tiling for Melbourne retail, hospitality, and office spaces requires tiles rated PEI 5 — the highest wear rating — and typically a slip resistance of at least R9 (DIN 51130 ramp test) or P3 wet pendulum for areas accessible to the public. Large-format porcelain in structured or matt finishes is standard for Melbourne commercial floors. Ali Star Tiling services commercial floor tiling across the western suburbs, including Melton, Bacchus Marsh, and Sunbury.
Subfloor Assessment: The Step That Determines Everything
Before any floor tile is selected or ordered, the subfloor must be assessed. This is the single most important pre-installation step and the one most often skipped when Melbourne homeowners manage their own renovations or engage an inexperienced tiler.
Concrete Subfloors
Most Melbourne homes built after 1960 have concrete slab subfloors. Concrete slabs are generally an excellent tile substrate, but several conditions must be checked before tiling proceeds:
- Flatness. A 3mm straightedge check across the slab surface identifies any high or low spots that need grinding or levelling compound before tiles are laid. Melbourne slabs that have settled unevenly, developed cracks, or have aggregate exposed at the surface all require preparation.
- Moisture. Concrete slabs can hold residual moisture, particularly in Melbourne's western growth corridor where newer homes are built on clay soils with high moisture movement. Tiling over a damp slab without moisture testing and appropriate primer or membrane can cause adhesive failure months after installation. A simple moisture test before tiling avoids this entirely.
- Contamination. Old adhesive, paint, sealers, or curing compounds on the slab surface prevent proper adhesive bond. The surface must be clean and free of contamination. Grinding or scarifying may be required for heavily contaminated slabs.
Timber Subfloors
Melbourne's older homes, particularly weatherboard and double-brick properties built before 1960, often have timber subfloors (particle board or tongue-and-groove timber over joists). Tiling over a timber subfloor requires additional consideration because timber moves with moisture and seasonal temperature changes in ways that concrete does not.
The key requirements for tiling over a timber subfloor in a Melbourne home are:
- Deflection testing. The subfloor must be stiff enough that it does not flex noticeably underfoot. Excessive deflection (more than L/360 of the joist span under load) will cause grout cracking and eventual tile debonding regardless of adhesive quality.
- Fibre cement sheet overlay. In most cases, a layer of compressed fibre cement sheet (minimum 6mm, preferably 9mm) is installed over the existing timber floor before tiling. This provides a stable, dimensionally consistent surface for the tile adhesive and decouples the tile from the movement of the timber below.
- Flexible adhesive. A C2TE (flexible polymer-modified) adhesive is mandatory when tiling over timber substrates. Standard cement-based adhesives will crack with the seasonal movement of a timber-framed floor.
Setting Out: The Step Most Melbourne DIYers Skip
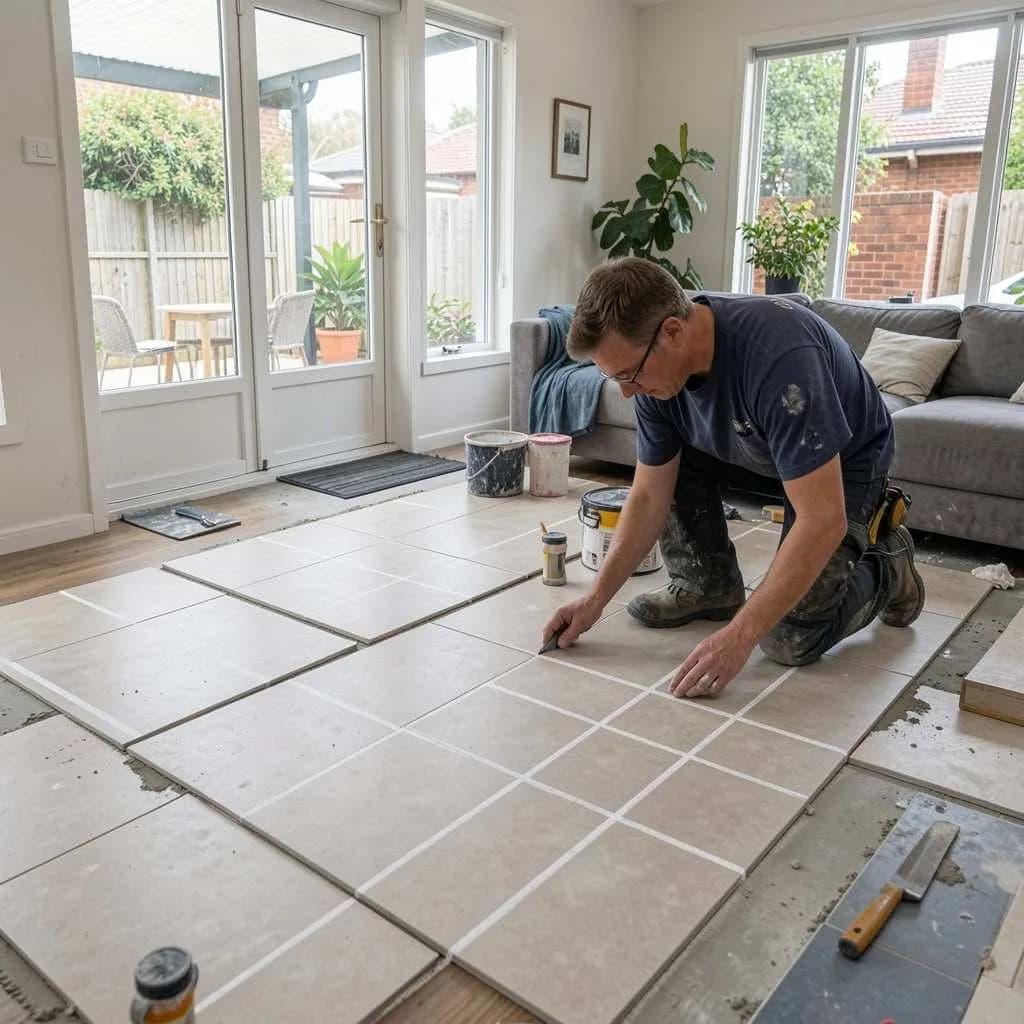
Setting out is the planning and marking process that determines where every tile will land on the floor before any adhesive is mixed. It is the step that separates a floor where cut tiles fall evenly at both edges from a floor where one edge has a full tile and the opposite edge has a 30mm sliver that looks unfinished and unprofessional.
Professional setting out for a Melbourne floor tiling project involves:
- Finding the true centre of the room. The floor is measured and the centre point established. Centre lines are snapped in both directions using chalk lines. These become the reference for the entire layout.
- Dry laying the first course. Tiles are laid out dry from the centre lines toward the walls in both directions. This shows exactly where cuts will fall at each wall. If a sliver cut lands at a visible wall, the layout is shifted half a tile in that direction so the cut at both sides is equal and acceptably sized.
- Accounting for features. Floor wastes, island bench positions, doorway thresholds, and any fixed features are factored into the layout before adhesive goes down. A floor waste that lands in the middle of a tile creates a difficult cut; planning the layout so the waste falls at a grout joint is far cleaner.
- Establishing the starting point. Once the dry layout confirms where tiles will fall, the first tile is fixed at the centre intersection and the tiler works outward in quadrants. This ensures the room reads symmetrically from the most visible entry point.
Skipping setting out — starting from a wall corner and tiling across the room — is the single most common mistake in DIY floor tiling. The error is obvious by the time the opposite wall is reached and cannot be fixed without removing already-fixed tiles.
Floor Tile Layouts and Patterns: What Melbourne Homeowners Are Choosing in 2026
| Layout Pattern | Best For | Installation Difficulty |
|---|---|---|
| Straight grid (stacked) | Large-format tiles in open-plan spaces. Clean, contemporary look. | Standard |
| Running bond (brick pattern) | Rectangular tiles, timber-look porcelain. Classic and versatile. | Standard, careful edge planning |
| Diagonal (45°) | Makes narrow rooms feel wider. Adds visual interest to hallways. | Higher — more cuts, allow 15%+ extra |
| Herringbone | Timber-look tiles, subway-format tiles on floors. High visual impact. | High — precise setting out and cut accuracy |
| Versailles / opus | Mixed tile sizes, natural stone, Mediterranean aesthetic. | High — complex layout, needs experienced tiler |
| Large format with minimal joints | 600x1200mm+ tiles with 2–3mm joints. Prestige and commercial spaces. | High — extremely flat subfloor required |
Diagonal and herringbone layouts increase tile wastage by 10–20% compared to straight lays. Always order tiles with wastage calculated for your specific pattern. Ali Star Tiling calculates wastage and tile quantities as part of every quote.
Floor Tiling Costs in Melbourne: 2026 Guide
Floor tiling costs in Melbourne depend on the tile format, the room size, the subfloor condition, and the complexity of the layout. Here is a realistic breakdown for 2026.
| Cost Component | Typical Range | Notes |
|---|---|---|
| Subfloor prep — grinding/levelling | $8–$25/m² | Depends on extent of irregularities. Levelling compound adds cost. |
| Fibre cement sheet overlay (timber floors) | $15–$30/m² | Supply and fix over existing timber subfloor. Required for most timber floors. |
| Adhesive and grout materials | $8–$18/m² | Flexible adhesive standard; rapid-set or epoxy for specific applications. |
| Labour (standard format, straight lay) | $45–$65/m² | 300x300mm to 600x600mm tiles. Straight grid or running bond. |
| Labour (large format, 600x1200mm+) | $60–$85/m² | Requires flat subfloor, full-bed adhesive, precise installation. |
| Labour (diagonal or herringbone lay) | $65–$95/m² | Additional cut complexity and setting-out time. |
| Tile supply | $25–$150+/m² | Standard ceramic to premium large-format porcelain or stone. |
| Threshold strips and transitions | $30–$80 each | Aluminium or stainless at doorways and floor material changes. |
| Grouting and finishing | Typically included in labour | Confirm in your quote — some tilers price grouting separately. |
These are indicative ranges for Melbourne metro in 2026. Final pricing depends on room size, tile choice, subfloor condition, and access. Ali Star Tiling provides free, written, itemised quotes for all floor tiling projects. For a closer look at wet-area pricing, see our guide to bathroom tiling cost in Melbourne. Call 0455 233 816 or email info@alistartilingmelbourne.com.au.
Choosing Grout for Melbourne Floor Tiles: What Actually Matters
Grout selection for a floor is more consequential than for a wall because floor grout endures foot traffic, cleaning chemicals, moisture, and the mechanical stress of a floor being loaded and unloaded with every step. A few decisions matter significantly.
Grout Joint Width
- Rectified tiles (precision-cut). Can be laid with joints as narrow as 2–3mm. These minimal joints are visually clean and reduce grout surface area. Popular in Melbourne living areas and contemporary bathrooms.
- Non-rectified tiles. Require wider joints (4–6mm+) to accommodate manufacturing size variation. Trying to use minimal joints with non-rectified tiles results in visible size variation and uneven grout lines.
- Natural stone. Generally laid with 3–5mm joints. The natural variation in stone edges means tight rectified joints are rarely appropriate.
Grout Type for Floors
- Cement-based (unsanded). For joints up to 3mm. Not appropriate for floor joints wider than this — the grout is too soft and will crumble under foot traffic.
- Cement-based (sanded / coarse). For joints 3mm and wider. Standard for most Melbourne floor applications. Should be sealed after curing for light-coloured grouts in kitchens and laundries.
- Epoxy grout. Chemical and stain-resistant. Increasingly specified for Melbourne kitchen and laundry floors, commercial kitchens, and food preparation areas. Harder to work with than cement grout — requires experienced installation. Worth the cost in high-contamination environments.
Grout Colour for Floors
Light grout on a floor is a long-term commitment to frequent cleaning. Melbourne homes with pets, children, or heavy foot traffic find that mid-grey, charcoal, or earth-toned grout in the same colour family as the tile is far more practical than white or cream. Grout sealing after installation reduces staining but does not eliminate it; the floor will eventually look as clean as the grout colour allows it to be.
Common Floor Tiling Mistakes in Melbourne Homes
- Buying tiles before assessing the subfloor. The subfloor condition affects which tiles can be used and what preparation is required. Large-format tiles need a flatter subfloor than smaller formats. Buying tiles first and then discovering the subfloor needs significant levelling can delay the project and complicate the budget.
- Choosing polished tiles for a floor. Polished porcelain and polished marble look exceptional in a showroom and are dangerously slippery when wet on a floor. In a living area they also show every piece of dust, pet hair, and foot mark far more than a satin or structured finish. For floors, always specify an appropriate slip resistance rating — the same rule that applies to our outdoor tiling projects.
- Underestimating tile wastage. Standard allowance is 10% for a straight lay, 15% for a diagonal lay, and 15–20% for herringbone. Running short mid-installation is one of the most stressful renovation problems: tiles from different batches have shade variation that is often visible, particularly in plain colours.
- Not confirming adhesive coverage. Ask your tiler specifically how adhesive coverage will be achieved for your tile size. For tiles larger than 300x300mm, back-buttering (applying adhesive to the tile back as well as the floor) is generally required to achieve the 80% minimum coverage. A tiler who uses dot-and-dab or spot-fixing for large format floor tiles is not meeting the Australian standard.
- Ignoring expansion joints in large floor areas. Any tiled floor area larger than approximately 40m², or any floor spanning multiple rooms, requires expansion joints at regular intervals and at all perimeter edges. These are filled with flexible silicone rather than grout. Rigid grout throughout a large floor area will crack — typically within the first year — as the building moves seasonally.
- Choosing a tiler based on price alone. The lowest quote for floor tiling in Melbourne almost always reflects reduced scope: less subfloor preparation, lower-grade adhesive, or missing steps like setting out and expansion joints. The floor you are installing will be in place for fifteen to twenty years. The difference between the cheapest and the correct quote is rarely worth the risk — our guide to choosing a Melbourne tiler covers the checks that matter before you commit.
Floor tiling a home that's still under construction? Our tiling new build Melbourne guide covers what the builder's floor tile allowance actually includes and when upgrading to large-format porcelain is worth it.
Budgeting your floor tiling project? See our tiling cost guide Melbourne for current 2026 rates.
Unsure what grout colour suits a large-format floor? Our grout colour guide Melbourne explains why matching grout keeps big tiles looking their best.
Need a floor tiler in Melbourne?
Call Ali Star Tiling on 0455 233 816 or email info@alistartilingmelbourne.com.au for a free, written quote. We tile floors in living areas, hallways, laundries, kitchens, and commercial spaces across Melbourne's western and northern suburbs. Mon–Sat 7am–6pm. Or reach out via our contact page.
Not sure which tile suits your home yet? Our best tiles for Melbourne homes guide breaks down the top options room by room for 2026. Flooring a shop, office, or hospitality fitout instead? See our commercial tiling Melbourne guide for wear ratings, slip compliance, and specification advice.
Worried about uneven floor tiles? Learn about tile lippage tolerance and how it is measured.
FAQs