
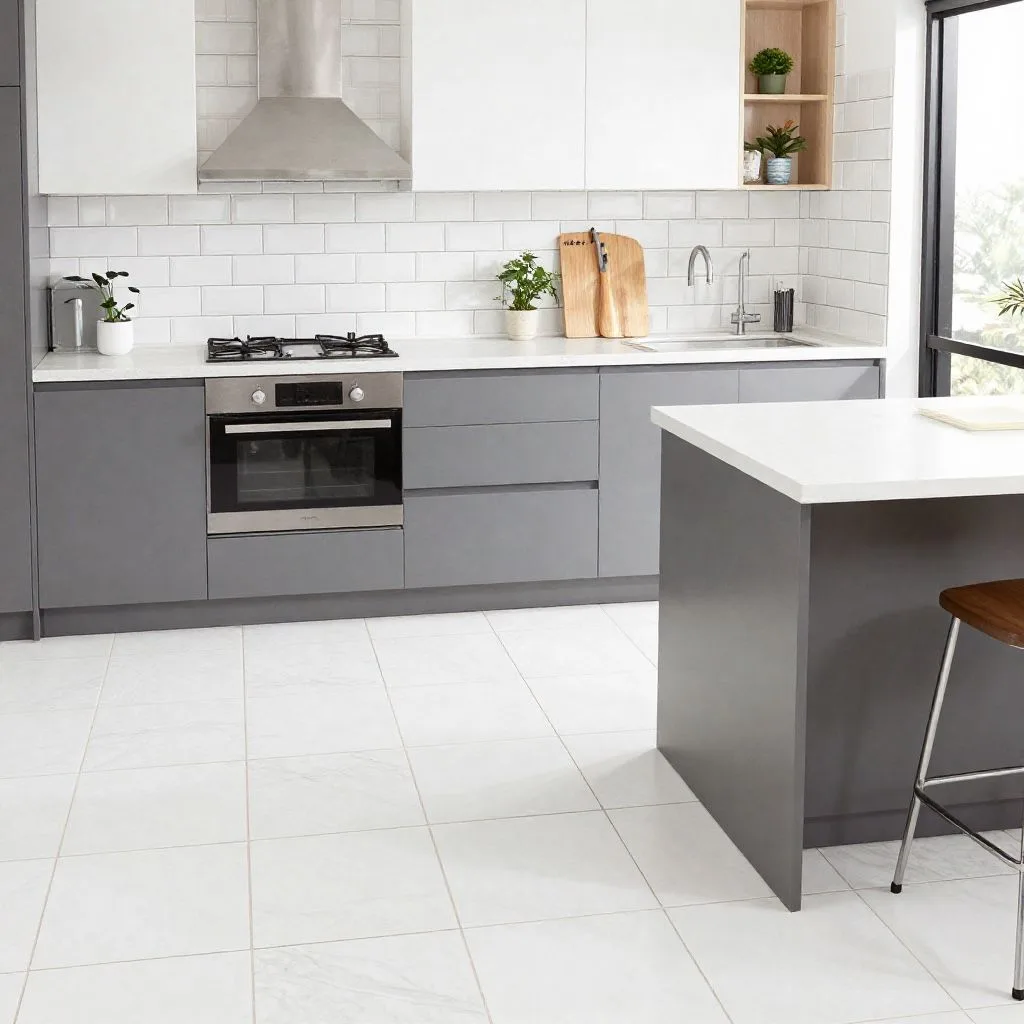
The kitchen is the most renovated room in Melbourne homes, and for good reason. It is the space that adds the most measurable value to a property, gets used the most intensively, and is judged most critically by prospective buyers and tenants. Tiling is the element of a kitchen renovation that most influences both its visual appeal and its long-term performance. The wrong tile choice or a poorly executed installation in a kitchen shows within months: stained grout behind the cooktop, cracked floor tiles under appliance weight, a splashback that peels at the silicone joint where it meets the benchtop.
This guide covers kitchen tiling in Melbourne from every angle: how to approach the floor, the splashback, and the overall tile coordination as an integrated design decision rather than three separate choices; what tile types perform best in each zone; what a kitchen tiling job costs in Melbourne in 2026; and how to choose a kitchen tiler in Melbourne who will deliver a result that looks as good in ten years as it does at handover.
Thinking About Kitchen Tiling as a Whole: Floor, Splashback, and Flow
Most Melbourne homeowners approach kitchen tiling as a series of separate decisions: choose the floor tile, then choose the splashback tile, then hope they work together. The kitchens that look genuinely considered and cohesive are almost always the ones where these decisions were made together, with the relationship between surfaces as the starting point rather than an afterthought.
The key relationships to think about before selecting any tile:
- Floor to splashback tone. Warm-toned floor tiles (beige, sandy travertine, warm grey porcelain) generally read better with warm-toned splashbacks. Cool-toned floors (charcoal, blue-grey porcelain, concrete-look) coordinate with cooler splashback choices. Mixing warm and cool across floor and vertical surfaces can work intentionally as contrast, but requires more careful selection.
- Grout colour consistency. Using the same or similar grout colour across the floor and splashback creates visual continuity even when the tiles themselves are different. Dramatically different grout colours on floor and splashback can feel disjointed in an open-plan kitchen where both surfaces are visible simultaneously.
- Scale and format. Large-format floor tiles with a large-format splashback can feel heavy if the kitchen is modest in size. Pairing large-format floors with a finer-scaled splashback tile creates contrast that prevents the room from feeling over-tiled. Conversely, a small-format floor mosaic with a large-format splashback panel can feel mismatched. Neither is a rule, but both are worth consciously considering.
- Transition to adjacent spaces. In open-plan Melbourne homes where the kitchen flows into a living or dining area, the floor tile decision affects the entire visible floor plane. A tile that looks appropriate in the kitchen zone may read differently across a 60sqm open-plan area. Many Melbourne homeowners use the same tile throughout the kitchen, dining, and living areas for visual continuity — a decision that must be made before any tile is ordered.
Q: Should kitchen floor and splashback tiles match in Melbourne homes?
A: Kitchen floor and splashback tiles do not need to match, but they should coordinate intentionally. The most successful Melbourne kitchens use tiles that share a tonal family — warm or cool — even when the formats and surfaces are different. Grout colour consistency across floor and splashback also helps create visual cohesion. Ali Star Tiling advises Melbourne clients on tile coordination as part of the quoting process; bringing tile samples from your supplier to the consultation helps assess how the combination reads before installation begins.
Kitchen Floor Tiling Melbourne: What Works Best
The kitchen floor is the highest-traffic, highest-demand tiled surface in any Melbourne home. It must handle daily foot traffic, chair and appliance movement, food and liquid spills, and the compressive load of heavy items — all while remaining safe underfoot when wet and looking good for the decade-plus it will be in place before the next renovation.
Tile Type Recommendations for Melbourne Kitchen Floors
| Tile Type | Size Range | Finish | Performance | Notes |
|---|---|---|---|---|
| Porcelain (satin/structured) | 600x600mm to 600x1200mm | Satin or lightly textured | Excellent | The most practical kitchen floor tile for Melbourne in 2026. Low porosity, durable, safe when wet in satin finish, easy to clean. Avoid polished finishes on floors. |
| Ceramic (glazed) | 300x300mm to 600x600mm | Satin or matt | Good | More affordable than porcelain. Higher porosity means it absorbs spills more readily — appropriate for kitchen floors with prompt cleaning. PEI 4 minimum. |
| Timber-look porcelain | 200x1000mm to 300x1200mm | Structured wood texture | Excellent | Very popular in Melbourne open-plan homes. Achieves the warmth of timber with tile's moisture and wear performance. Ideal where the kitchen flows to the living area. |
| Natural stone (honed) | 400x400mm to 600x600mm | Honed (never polished) | Moderate | Beautiful but requires periodic sealing and more careful maintenance. Honed travertine and limestone work well. Polished stone is unsafe on kitchen floors. |
| Encaustic / cement tiles | 200x200mm to 300x300mm | Matt unglazed | Moderate | High character, heritage aesthetic. Popular in Melbourne inner-suburb renovations. Requires sealing and specific cleaning products. More maintenance than porcelain. |
Slip Resistance for Kitchen Floors
Kitchen floors are a wet area in practice — spills, splashes from the sink, and tracked-in moisture from adjacent outdoor areas all make slip resistance a genuine safety consideration. Under Australian Standard AS 4586, kitchen floors should meet a minimum P3 wet pendulum rating. Satin and structured finishes on porcelain and ceramic tiles typically achieve this. Polished finishes typically do not and are not appropriate for kitchen floors regardless of how they look in a showroom.
Kitchen Floor Tile Sizes: What Works in Melbourne Kitchens
Tile format choices for kitchen floors are governed by the size and layout of the space rather than by a universal rule:
- Galley kitchens (narrow, linear). Larger tiles make a narrow space feel wider but require a very flat subfloor. 600x600mm in a diagonal or large-format 600x300mm in a running bond work well. Avoid very large formats (800x800mm+) in spaces under 2.5m wide.
- Island kitchen (L-shape or U-shape with island). Large-format tiles (600x600mm or 600x1200mm) in a straight grid layout read very well in a larger kitchen with an island. The clean lines of large-format tile complement the geometry of a kitchen island.
- Open-plan kitchen flowing to dining and living. The tile must work across the entire floor plane, not just the kitchen zone. This often means selecting a tile based on the living area context rather than purely the kitchen zone, then verifying it works behind the island and near the appliances. Our floor tiling Melbourne guide covers layout planning for open-plan floors in more depth.
Q: What are the best floor tiles for a Melbourne kitchen?
A: For Melbourne kitchen floors in 2026, rectified porcelain in a satin or lightly textured finish is the most practical and popular choice — durable, low-maintenance, and available in formats from 300x300mm to 600x1200mm. Timber-look porcelain is the most popular choice for open-plan Melbourne homes where the kitchen flows to the living area. Avoid polished tiles on kitchen floors; they become slippery when wet. A minimum PEI 4 wear rating and P3 slip resistance (wet pendulum) should be specified. Ali Star Tiling installs kitchen floors across Melbourne's western and northern suburbs — call 0455 233 816 for a free quote.
Kitchen Splashback Tiling Melbourne: Choosing the Right Tile for the Zone
We have a dedicated guide to kitchen splashback tiling Melbourne that covers this topic in full detail. Here we focus on how splashback tile selection integrates with the floor and the rest of the kitchen tiling scope.
The splashback is the vertical surface between the benchtop and the overhead cabinets — typically 600mm in height across the working sections of the kitchen. Behind the cooktop it faces the highest heat and grease exposure. At the sink end it faces water and cleaning chemicals. These performance requirements should drive the tile selection before aesthetics are considered.
What Changes Behind the Cooktop
- Heat rating. Tiles directly behind a gas cooktop face ambient temperatures that can affect certain glass tiles and low-quality ceramics. Specify glazed ceramic or porcelain with a confirmed heat rating for this zone. Most standard glazed tiles are appropriately confirmed with your tile supplier for the specific product.
- Grout performance. The grout joint behind a cooktop stains faster and more aggressively than any other kitchen surface. Epoxy grout or a sealed, mid-toned cement grout behind the cooktop is a practical investment. White grout behind a gas cooktop is a maintenance commitment most Melbourne homeowners regret within the first year.
- Finish. A smooth glazed finish (satin or gloss) cleans more easily behind a cooktop than any matt, textured, or unglazed surface. Grease and cooking residue have less surface texture to adhere to.
The Splashback-to-Benchtop Silicone Joint
The joint between the base of the splashback tiles and the top of the benchtop — whether stone, laminate, or timber — must be finished with flexible silicone, not rigid grout. This is the most common finishing error in Melbourne kitchen splashback installations. The bench and the wall move independently with seasonal temperature and humidity changes, and rigid grout at this junction cracks within months. A colour-matched silicone joint is the correct finish; it accommodates movement and remains watertight indefinitely when applied correctly. The same movement-joint principle underpins proper waterproofing in Melbourne wet areas, where flexible detailing at junctions is just as critical.
Coordinating Floor and Splashback Tiles in a Melbourne Kitchen
The most common coordination question Melbourne homeowners ask is whether to use the same tile on the floor and the splashback. The answer in most cases is no — but not because it cannot be done. Using the same tile on both surfaces tends to read as monotonous in a kitchen unless the tile itself is highly distinctive (a bold pattern or strong texture that benefits from repetition). More commonly, different tiles in a coordinated palette produce a more interesting and considered result.
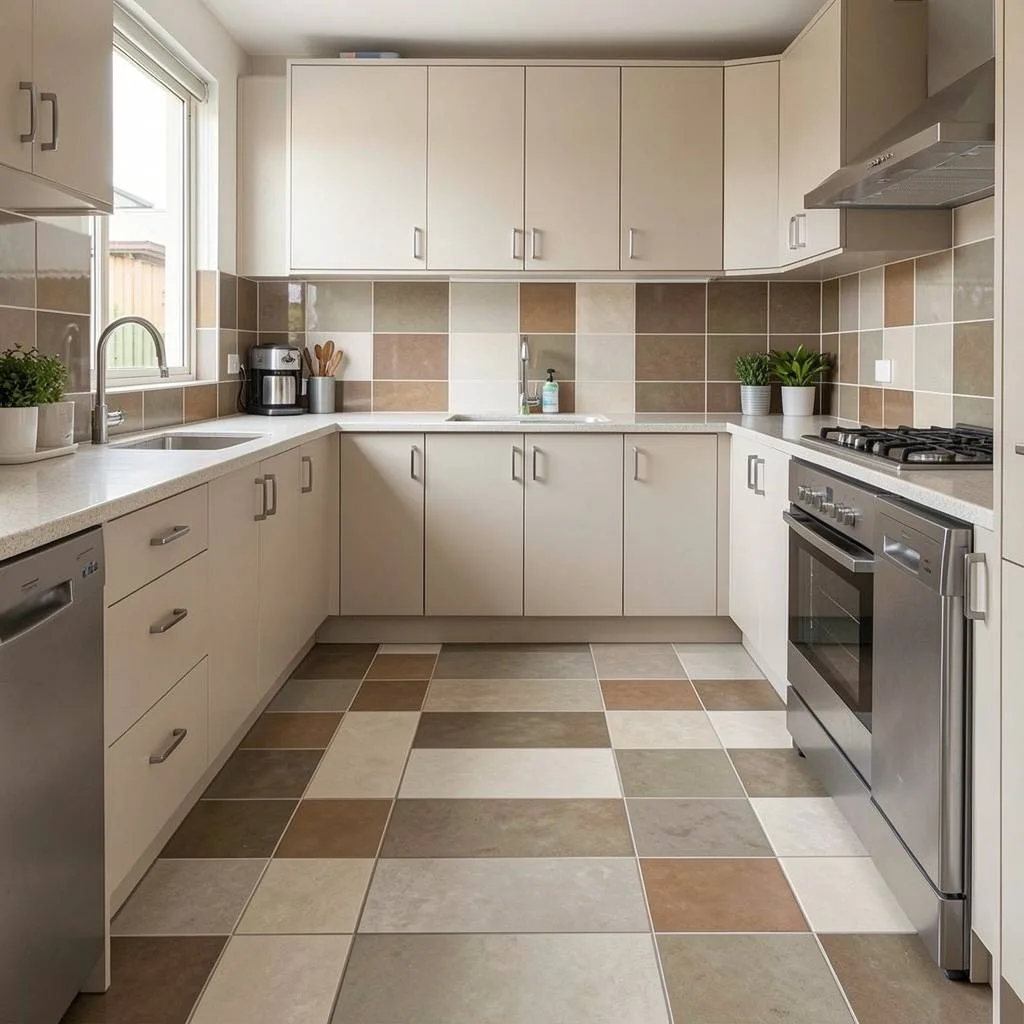
| Floor Style | Splashback Pairing That Works | Why It Works |
|---|---|---|
| Large-format grey porcelain (600x600mm satin) | White subway tile (100x300mm) in stacked or running bond | Classic contrast: the large grey floor grounds the space; the white vertical tile adds light and texture without competing. |
| Timber-look porcelain (200x1200mm warm oak) | Warm white or off-white large-format tile (600x300mm) | Warm tones complement each other. The vertical format of the splashback contrasts with the horizontal timber plank pattern below. |
| Concrete-look porcelain (600x600mm cool grey) | Fluted or ribbed tile in white or light grey | The texture of the fluted splashback adds depth against a flat concrete floor. Both are cool-toned. |
| Terrazzo-look porcelain (600x600mm) | Plain white or cream ceramic in a format that doesn't compete | The terrazzo pattern is the feature — the splashback should be simple and complementary, not competing for attention. |
| Travertine-look porcelain (400x400mm warm beige) | Handmade-look white tile with slight variation | Natural, artisanal aesthetic on both surfaces. Warm tones throughout. Works well in Melbourne homes with heritage or Hamptons influence. |
Kitchen Tiling Costs Melbourne: What to Budget in 2026
Kitchen tiling costs in Melbourne depend on the scope of the work — floor only, splashback only, or a full kitchen tiling scope including both — plus the tile format, subfloor condition, and layout complexity. For a wet-area comparison, see our bathroom tiling cost guide for Melbourne. Here is a realistic breakdown for 2026:
| Scope / Component | Labour Cost Range | Tile Supply Range | Typical Total |
|---|---|---|---|
| Splashback only (3–5 linear metres) | $350–$650 labour | $25–$100/m² | $500–$1,200 depending on tile choice |
| Kitchen floor only (10–20m²) | $450–$1,300 labour | $30–$120/m² | $750–$3,700 depending on size and tile |
| Kitchen floor + splashback (combined scope) | $750–$1,800 labour | $25–$120/m² | $1,200–$4,500+ depending on scope and tile choice |
| Full kitchen tiling (floor, splashback, feature wall) | $1,200–$2,800 labour | $25–$150/m² | $2,000–$7,000+ for large or premium kitchens |
| Subfloor preparation (levelling or overlay) | $8–$30/m² additional | — | Add to floor tiling scope if required |
| Large-format tile premium (600x1200mm+) | $60–$85/m² labour (vs $45–$65 standard) | — | Additional 20–30% on labour for large formats |
These are indicative ranges for Melbourne metro in 2026. Final pricing depends on the specific tile sizes, subfloor condition, and kitchen layout. Ali Star Tiling provides free, written, itemised quotes — call 0455 233 816 or email alistartiling@yahoo.com.
Q: How much does kitchen tiling cost in Melbourne?
A: Kitchen tiling in Melbourne costs approximately $350–$650 in labour for a splashback only, $450–$1,300 for a kitchen floor (10–20m²), and $750–$1,800 combined for floor and splashback together. Tile supply adds $25–$120/m² depending on the tile choice. A complete kitchen floor and splashback tiling scope — labour and tiles combined — typically costs $1,200–$4,500 for a standard Melbourne kitchen. Ali Star Tiling provides free written quotes for kitchen tiling across Melbourne's western and northern suburbs.
Installation: What a Professional Kitchen Tiling Job Looks Like
Subfloor and Substrate Assessment
Before any kitchen tile is selected or ordered, the existing substrate should be assessed. Kitchen floors in Melbourne's established suburbs, particularly older homes in Melton, Bacchus Marsh, and the inner western suburbs, frequently have timber subfloors that require a fibre cement sheet overlay before tiling. Even concrete slab kitchens may need grinding or levelling compound if the floor is not flat within the 3mm tolerance required for large-format tiles.
Setting Out the Kitchen Floor
Kitchen floor setting out is more complex than a bedroom or hallway because of the fixed obstacles in the space: island benches, cooking appliances, and the relationship between the floor plan and the cabinetry layout. A tiler who sets out a kitchen floor correctly plans the tile layout relative to the island bench and the most visible entry point — ensuring that cut tiles fall at the edges under cabinets where they are less visible, not in the middle of the open floor plan where they dominate.
Splashback Installation Sequence
In a kitchen renovation, the splashback is tiled after the floor, not before. The floor tile establishes the finished floor height, which determines where the base of the splashback tiles starts. Tiling the splashback before the floor is installed means the base course of splashback tiles may need to be cut or adjusted after the floor is laid, risking damage to already-fixed wall tiles. In a well-sequenced kitchen renovation, the order is: floor fixed → grout cured → silicone at skirting → splashback tiled → splashback grouted → silicone at benchtop junction.
Grouting and Silicone Finishing
Kitchen grouting should use a stain-resistant, sealed, or epoxy grout product, particularly behind the cooktop and at the sink end of the splashback. All internal corners (where two tiled surfaces meet) and the joint at the benchtop must be silicone-jointed, not rigid grouted. This is particularly important in kitchens because the benchtop and the tiled wall move independently — silicone accommodates this movement where rigid grout cannot.
Q: What is the correct order to tile a kitchen in Melbourne?
A: In a kitchen renovation, the correct sequence is: floor tiling first (allowing adhesive to cure fully — 24 hours minimum), then grouting the floor, then applying silicone at the skirting junction, then tiling the splashback, then grouting the splashback, then finishing with silicone at the benchtop-to-splashback junction. Tiling the splashback before the floor creates sequencing problems that require adjustment cuts at the base course and risk damage to fixed tiles. Ali Star Tiling follows this sequence on every Melbourne kitchen tiling project.
Kitchen Tiling Trends in Melbourne 2026
- Oversized subway tiles on splashbacks. The 75x150mm subway tile has largely given way to 100x300mm and 130x400mm formats. Larger subway tiles deliver the same clean, stackable aesthetic with far fewer grout lines — and grout lines are what show dirt most visibly in a kitchen.
- Continuous floor from kitchen to living area. The most requested floor treatment in Melbourne new builds and large renovations is a single tile running continuously from the kitchen through the open-plan dining and living area. This requires the tiler to set out the whole floor as one space rather than treating the kitchen separately.
- Fluted and textured splashbacks. Vertically ribbed or fluted tiles as a feature splashback behind the cooktop, with a plainer tile completing the rest of the run, is the dominant feature splashback treatment in Melbourne kitchens in 2026. The texture catches light and creates depth without requiring a bold pattern or colour.
- Dark grout on light tiles. Charcoal or dark grey grout with white or off-white tiles is holding strong in Melbourne kitchens. The contrast emphasises the tile grid, reads as deliberate, and handles the inevitable kitchen grime better than light grout behind a cooktop.
- Splashback tiled to the ceiling. Continuing the splashback tile from the benchtop to the ceiling — past the range hood, up to the full height of the wall — is increasingly common in higher-specification Melbourne kitchen renovations. It eliminates the painted plasterboard strip above the overhead cabinets and gives the kitchen a more complete, considered finish.
For a deeper look at splashback styles, floor pairings, and feature walls, see our kitchen tiling ideas Melbourne guide.
Specifying a kitchen splashback for a home still under construction? Our tiling new build Melbourne guide explains what builder packages typically leave out.
Comparing splashback and floor pricing? See our tiling cost guide Melbourne for full 2026 kitchen tiling rates.
Choosing splashback grout? Our grout colour guide Melbourne covers the best combinations for kitchen tiles.
Planning a kitchen renovation in Melbourne? Call Ali Star Tiling on 0455 233 816 or email us for a free written quote. We tile kitchens across Melbourne's western and northern suburbs — splashbacks, floors, and full renovations. Mon–Sat 7am–6pm.
Want the pricing up front? See our kitchen tiling prices Melbourne breakdown for splashback, floor, and pantry costs.
Renovating the whole kitchen, not just retiling? Our renovation trade sequence guide covers when tiling happens relative to joinery, plumbing, and electrical work.
Just need the splashback done? Our splashback tiling Melbourne guide covers tile types, setting out, and realistic costs for a splashback-only project.
FAQs
Frequently Asked Questions: Kitchen Tiling Melbourne
01How long does kitchen tiling take in Melbourne?
02Can kitchen tiles be laid over existing tiles in Melbourne?
03What is the best grout colour for a Melbourne kitchen splashback?
04Does Ali Star Tiling do kitchen tiling in Melbourne's western suburbs?
05Should I use the same tile company for the kitchen floor and splashback?
Comparing installers before you commit? Our guide to choosing tiling services in Melbourne covers the quote, portfolio, and workmanship checks worth applying to any kitchen tiler.